Webflow Installation Gotchas
⏱️ TL;DR
- How to access the install code page in Memberstack, implement the script into Webflow and publish the changes.
- Webflow Pricing Requirement: To use Memberstack, your Webflow site must allow custom code. This requires either a paid Site Plan (Basic or Premium) OR a paid Webflow Workspace Plan (which unlocks custom code even on free Starter sites).
- Colon-Stripping Bug: Webflow's custom attributes panel sometimes silently strips colons (turning data-ms-price:add into data-ms-price). This breaks your checkout.
- The Fix: Place a small HTML Embed element directly next to your button to inject the correct attribute synchronously using a tiny snippet of JavaScript.
- How to add Memberstack to a live site!
1) Installing Memberstack in Webflow
This will explain how to install the Memberstack script and set up your Memberstack application in Webflow. It provides step-by-step instructions on accessing the Install Code page in Memberstack, implementing the script into Webflow, and publishing the changes.
2) Copy the Install Code
You can get it from the Getting started page or from the Install Code section of the settings page.
You'll find a "Copy code" button. Click on it to copy your personalized header script to your clipboard.
3) Implement the Script into Webflow & Publish
Next, follow these steps in your Webflow project:
- While in the Webflow designer view of your Webflow project, click on the top left menu (the "w" or hamburger menu).
- A dropdown menu will appear. Click on "Site settings".
- Click on the "Custom code" tab.
- Paste the Memberstack Webflow Install script in the Head code section. Ensure it is placed at the very top if you have already added code before. (If this fails, please see trouble shooting below).
- Click on "Save Changes".
- After saving, click on "Publish".
- Confirm and publish to finalize the installation of your header script.
4) Webflow Pricing: What Plan Do I Need?
To install Memberstack, you must be able to add custom code to your site's <head>. Webflow restricts custom code based on your plans.
Here is how Webflow’s May 2026 pricing model maps to Memberstack's requirements:
Option A: Upgrade Your Site Plan (Most Common)
You can unlock custom code on an individual site by upgrading to any paid Site Plan:
- Starter ($0/mo) — ❌ Custom code is disabled.
- Basic ($15/mo) — Custom code is enabled. Perfect for simple membership sites.
- Premium ($25/mo) — Custom code is enabled. Best for larger sites with 20K CMS items available as well as other advanced features.
Option B: Upgrade Your Workspace Plan (Best for Designers/Agencies)
If you have a paid Webflow Workspace Plan (e.g., Core, Growth, Freelancer, or Agency), custom code is unlocked on all free Starter sites within that Workspace.
- This means you can build, test, and preview a fully functional Memberstack membership site on a free .webflow.io staging domain without paying for a Webflow Site Plan until you are ready to launch on your custom domain!
5) Webflow Bug: The data-ms-price:add Colon-Stripping Workaround
A known bug in Webflow's designer causes the custom attributes panel to occasionally strip colons upon publishing.
- The Problem: You enter data-ms-price:add as the name and prc_your-id as the value. But on your live site, Webflow publishes it as data-ms-price="prc_your-id". Because the :add is missing, Memberstack doesn't know what action to perform, and clicking the button does absolutely nothing.
The Solution: Synchronous HTML Embed Workaround
If Webflow is stripping your colons, you can bypass their attributes panel completely by adding the attribute using JavaScript via an HTML Embed.
⚠️ Critical Rule: This script must run synchronously as the page loads. Do not wrap this code in DOMContentLoaded or window.onload listeners. If you do, Memberstack's initialization script will run first, miss the attribute, and your button will fail to work.
Step-by-Step Setup:
- In Webflow, select your signup/purchase button.
- Remove any data-ms-price:add custom attributes from Webflow's native settings panel.
- Drag an HTML Embed element from the Add panel and place it directly below/next to your button in the navigator.
- Insert the following code into the HTML Embed:
- Replace 'prc_YOUR_PRICE_ID_HERE' with your actual Memberstack Price ID.
- Publish your site. The attribute is now injected perfectly with the colon intact before Memberstack initializes!
6) Outdated Info: No More Project Transfers!
In the past, our documentation suggested transferring your Webflow project to an email address instead for manual installation assistance.
Please do not transfer your Webflow projects to any Memberstack email.
Our installation process is now fully automated. If you run into issues, please use the Test Mode Inspector available on your test mode site or reach out directly to our support team by submitting a request to our customer service team.
7) What's Next?
Now that the code is installed, it's time to Create a Signup Form →. Follow the link to the next article for a guide on how to set up a signup form on your application.
8) Adding Memberstack to a Live Site
If you are adding Memberstack to an established website with lots of traffic, you probably don't want a "test-mode" badge showing up on every page. We have a solution!
All you need to do is replace the "app_your_application_id_goes_here" your app id and replace the install code with the script below. This will only load Memberstack when you are on a .webflow.io subdomain.
<script>
  var url = window.location.href;
  var targetDomain = "webflow.io";
  var memberstackAppId = "app_your_application_id_goes_here";

  if (url.includes(targetDomain)) {
    var script = document.createElement("script");
    script.setAttribute("type", "text/javascript");
    script.setAttribute("data-memberstack-app", memberstackAppId);
    script.src = "https://static.memberstack.com/scripts/v2/memberstack.js";
    document.head.appendChild(script);
  }
</script>
❓ Frequently Asked Questions (FAQ)
Q: Can I use Memberstack on a free Webflow Starter site if I don't have a paid Workspace?
No. Without a paid Site plan or a paid Workspace plan, Webflow completely blocks the custom code field in your site settings. Memberstack’s header script cannot be installed, and the platform will not function.
Q: How do I know if Webflow is stripping colons on my site?
Right-click your button on your published website and select Inspect. Look at the HTML code for the button. If you see data-ms-price="prc_..." instead of data-ms-price:add="prc_...", Webflow is stripping the colon.
Q: Does this colon-stripping bug happen to other attributes?
Yes. The bug is not specific to pricing; Sometimes Webflow's custom attributes panel will strip the colon from **any** attribute name that contains one (e.g., `data-ms-plan:add` or `data-ms-member:update`). Standard attributes like `data-ms-modal="signup"` or `data-ms-content="members-only"` work perfectly because they do not contain a colon. For any attribute that *does* require a colon, you can use the exact same HTML Embed workaround—just change `'data-ms-price:add'` in the script to your target attribute name (like `'data-ms-plan:add'`).
Q: Can I use the HTML Embed workaround for multiple buttons on the same page?
Yes! Because the script uses previousElementSibling, it is entirely relative. You can duplicate the button and the HTML Embed as many times as you like on a page, and each embed will only apply the attribute to the button directly above it. Just remember to update the Price ID and the relevant attribute name inside each embed.
Comments
11 comments
Hi, is it possible to add async or defer to this javascript code to reduce load time of the page?
Hey Luca Montalti 👋
It's not recommended unless you are okay with content being accessible until the Memberstack script loads. If you do decide to go this route, I recommend using our new data-ms-bind:style attribute to set member-only content and links to be hidden by default.
Thanks Duncan I will review this. The challenge I am having is with the loading speed of my home page upon which I don't have anything being loaded that is member gated.
When I input the memberstack standard code into the webflow header, I get a warning that the memberstack API is being loaded before the content is redered meaning my FCP is very long. When I run performance reports it is recommending me that I do the same - defer loading scripts until they are required.
https://pagespeed.web.dev/analysis/https-www-greenupmarketplace-com/od1weyhmpf?form_factor=mobile.
As such it would be good to understand if you could share an alternative option for the headercode where the memberstack APIs run on async / defer rather than upfront and whether doing that would have any implication.
The "Test mode" is showing up on the live domain althought we aren't enabling test mode! link is here: https://www.thenglishub.com/
I temporarily used this to hide it
Can you check again now? I added the www. version of your domain to your dashboard.
We already added the header code in webflow but it still say installation required.
Hey Matt 👋 Make sure you publish the site before testing the install code. It will only validate once you've published the changes.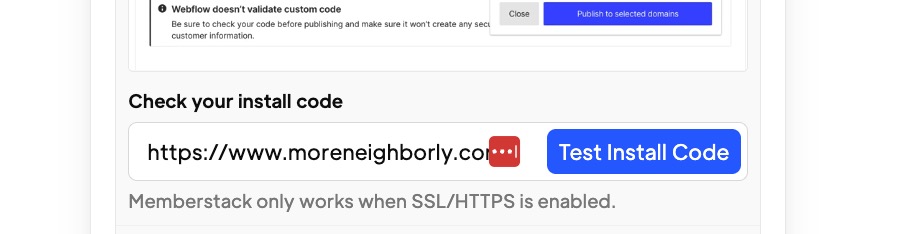
(this is on the getting started page)
We already launched and published our site

Matt Martinez Nice website!! Where are you seeing the "Installation required" message? If it's inside the Memberstack dashboard can you share a picture?
Oh I see! You can ignore that. We added those banners to indicate when an action is required in Webflow. But they don't change as you update your site... but it's a great idea to change that! I'll submit this to the team. We should hide that banner once we detect the script has been added.
Please sign in to leave a comment.